Creating compelling home videos takes practice, and we’ve put some tips together to get you started. They’ll help you get the most out of your camcorder, without adding expensive accessories and extras. You’ll record more watchable movies that you and your family can enjoy for years to come.
Our shooting tips fall into two categories — honing your technique for engaging movies and general suggestions for improving your shots.
Let’s start with how to record home movies:
1) Go light on the zoom. Overuse of zoom is a common problem, and can result in video that looks amateurish, or even worse, can make people dizzy. If you need to zoom in and out, take it slow and steady, and don’t zoom out again too soon. And you may want to avoid the use of digital zoom — it’s pretty much only good for giving you a closeup of some dancing pixels. While optical zoom won’t get you as close to your subject, you’ll appreciate the higher video quality when you review your recordings.
2) Frame your shots well. Fill the frame with your subject, and don’t be afraid to place him or her slightly off-center. For example, when filming kids at the pool, it tends to be more visually interesting to capture the children talking, laughing, or diving a bit to the left or right of center.
Framing your subject off to one side lets you capture more of the environment and atmosphere in your shot.

3) Use wide shots sparingly. You may want to rely on a wide sweeping shot of the setting to establish location, but after that, get a little more specific. Focusing on small details, like red lanterns hung on a Chinatown street or a single sun-bleached boat on a tropical beach, can do more to convey atmosphere than wide, general shots of a busy street or a long stretch of beach.
4) Shoot from several different vantage points. Recording an entire Little League game from the bleachers could be a bit dull to watch later. Footage captured from beside first base, the top of the bleachers, and the dugout can result in a much more interesting mix of shots, and can heighten the drama of important moments. Also, use the most effective shooting angle: kneel down to get on the same level as your subject, when appropriate, or climb up high to survey a scene.

Being on the same level as your subject, especially children, creates a much different effect than towering above them while recording.
5) Avoid backlighting. Just because we can see people’s faces when they’re backlit doesn’t mean the camera can. Too often, backlit shots result in uncomfortably bright light haloing a dark figure with no visible features so you miss out on the great facial expressions of loved ones. You can improve a backlit situation by moving to one side or another. Some camcorders even have a feature that lets you reduce the effects of backlighting.

Backlighting makes a big difference in the appearance and tone of your recording.

6) Unless you plan on editing, record only the important moments. If you’re going to edit your footage, go ahead and record every single second of your cousin’s wedding. If not, then remember that footage of the DJ testing the mike or of waiters going in and out of the kitchen may have historical merit, but offer little viewing enjoyment.
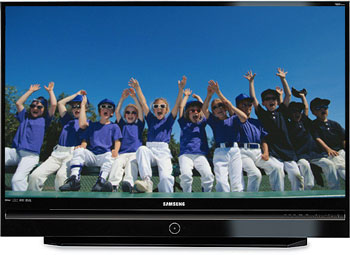
7) If you have a widescreen TV, record in widescreen. Many of today’s digital camcorders offer a 16:9 widescreen recording mode. This lets you record footage that matches a widescreen TV, without stretching or distorting the picture. You may want to take advantage of this option if you have an HDTV at home. (However, if you’re recording footage to send to fond grandparents who still have their trusty RCA from the 70’s, you may want to switch back to the standard screen shape.)
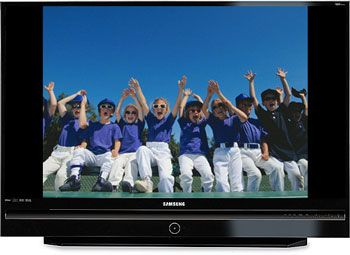
Shooting video that matches your widescreen TV allows you to capture more of the action.
8) Don’t overuse special effects. It’s cool that you can “solarize” your footage or make it sepia-toned, or try any number of other fun recording settings. But steer clear of the fun features when you’re filming important scenes. After all, if you decide later that part of the video really should have been shot in black-and-white, there’s easy-to-use movie editing software (sometimes free with a computer) that’ll let you make that change. Record the wedding in full color and then test out effects later on. This way, you’ll be able to preserve your original footage while you experiment with artistic effects and edits.
Now let’s take a look at a few general tips which can improve picture quality and make using your camcorder more convenient.
9) Try out a tripod. Shaky handheld shots are one of the biggest culprits when it comes to bad home movies. Although many camcorders come with various image stabilization technologies, these in-camera features can only do so much to correct handshake. Shooting from a flat surface or, better still, a tripod, is a good way to remedy this problem. And you may be surprised by how affordable and portable small video tripods can be.
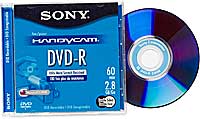
Don’t wait until you run out of space on a memory card, tape, or disc to buy more — make sure you have a spare or two on hand to avoid the stress of having to find a store that sells them later. (Sony Mini DVD-Rs shown above)
10) Keep plenty of memory cards, tapes, or discs on hand. Running out of recording space in the middle of filming is no fun, so you’ll want to make sure you have more media available. Be sure to pick up extra discs, tapes or memory cards, even if your camcorder also comes with built-in memory. And if you’re traveling, don’t count on buying extra media at your destination — many tourist spots sell a limited variety of memory cards, tapes, and discs with heavy mark-up.
If you do start to run out of space, and don’t have spare media on hand, you can switch to LP (long-play) mode. This isn’t something you’ll want to do often, since it saves you space on your media at the expense of image quality. But if your child’s football game goes into overtime, for example, you may want to switch to LP mode so you can record more of the final moments.
Want to have your home movies around for years to come? Be sure to copy your footage to a separate backup hard drive.
11) Keep a spare battery around. Backup battery power is just as important as keeping extra tapes or discs on hand. Some spare batteries offer longer recording times than the battery that came in the manufacturer’s box, so be sure to check out your options before you buy.
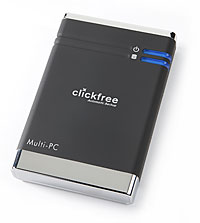
12) Back up your video. Tapes and discs can store your footage for years, but if something happens to them, you’re out of luck — there go Junior’s first steps or that fabulous vacation in the Rockies. So please remember to back up your video — either to additional discs or to an external hard drive. We recommend against using your computer’s hard drive to store everything long-term, because uncompressed digital video takes up a lot of space — approximately 1 gigabyte for every 5 minutes of footage — and because computer hard drives are susceptible to eventual failure. Check out our article on watching, sharing, and editing your home movies for more tips on ways to save your video.

by Tara Wisnewski, Crutchfield.com. All rights reserved. (reprinted with permission, originally posted May 1, 2009)


